But you don't know Yanka if you think that she stopped there. No, just when the pie was baking she invented dozen or more different fillings that could be used in this recipe instead of cabbage. Eggplant and chopped liver? Green onion and Georgian cheese? Fish? Shrimps? I swear, she just poured out the variants each one more delicious than other.
0 Comments
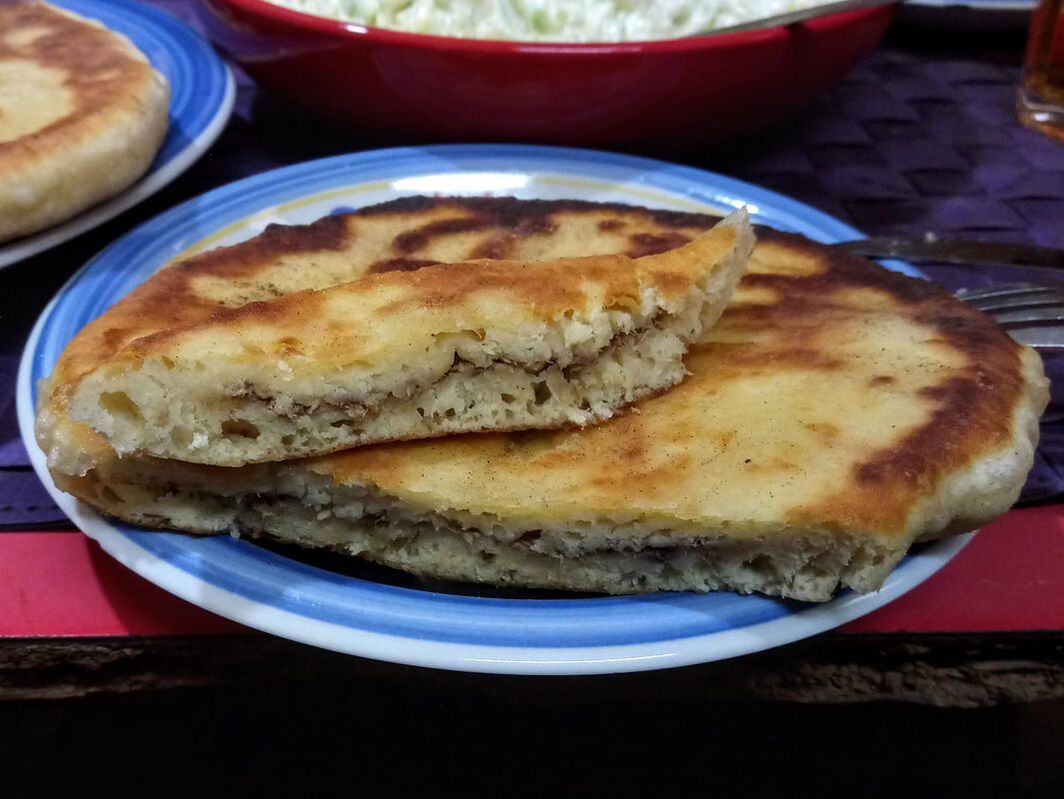
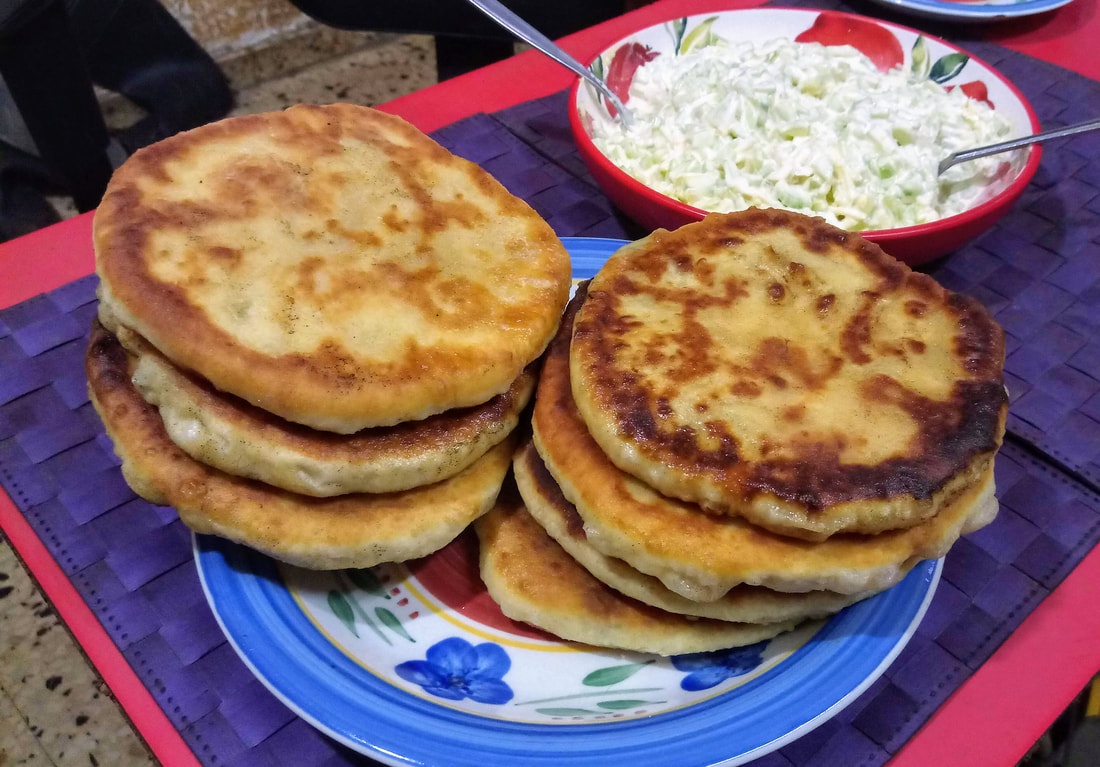 I've found the original recipe on Pinterest, but it was in Russian. When I've made these flat cakes, our non-Russian speaking friends liked them very much, so I've translated the recipe for them. You can check the original recipe HERE So, here it goes! Dough: 500 ml yogurt 1 tsp baking soda 1 egg 2 tbsp oil 500-550 g flour 50 g butter salt to taste more oil for greasing and frying more butter for greasing cakes when ready Filling: You can use almost anything for the filling. Just few examples:
Preparation: Pour yogurt into a large bowl and add baking soda. Set aside for 2-3 minutes until it becomes foamy. Add egg and 2 tbsp oil, mix well. Sieve the flour into the bowl with liquid mixture, knead a soft dough. It can be a little sticky, but it’s ok. Dust it with flour, cover with a towel and set aside for 10 minutes. Grease the working surface with oil and roll the dough into a cylinder. Cut to 8-9 pieces. Roll each piece into a circle 1.5 cm thick. Put a reasonable amount of filling in the center, pinch the edges, squeeze shut, turn upside down and flatten a little with your hand. Set aside for 2-3 minutes. Heat 2 tbsp oil in a frying pan and fry the cakes, covered, on both sides until golden brown. Grease each cake with butter when hot to make it softer when it cools down. If you make savory cakes, you can also sprinkle each one with salt, and if you’re making the sweet ones you can dust them with powdered sugar. Enjoy!
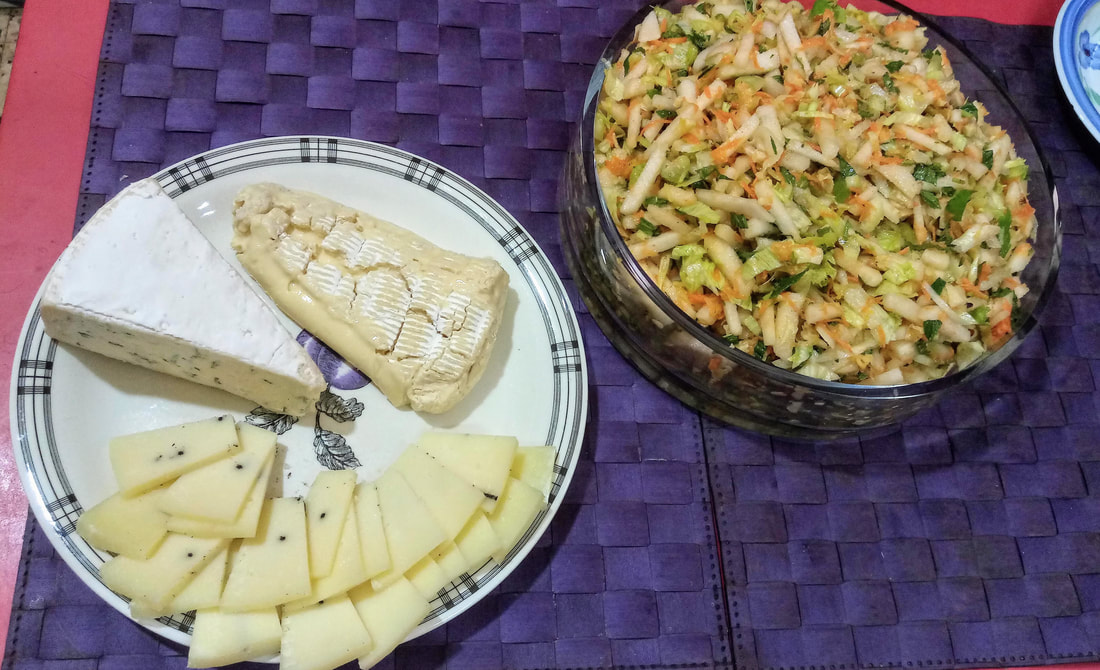 For the salad: 4 Korean pears 1 medium carrot 1 head iceberg lettuce 3-4 stalks celery 1 cup fresh mint (chopped) For the dressing: juice and zest of 1 lemon 3 garlic cloves 1.5 inch piece of ginger 3 tbsp vegetable oil 2 tbsp honey 0.5 cup chopped walnuts 0.5 tsp sweet paprika salt, pepper Preparation: Peel and de-core the Korean pears, cut into sticks approximately 1 x 0.2 inch size, grate the carrot, cut the lettuce into thin strips, cut celery stalks into small slices, add chopped mint leaves and mix well. Prepare the dressing: In a bowl mix lemon juice with grated zest and minced garlic. Peel and grate the ginger, add to the bowl. Add chopped walnuts, honey, vegetable oil and spices, mix well. Pour the dressing on the salad, mix thoroughly and serve! 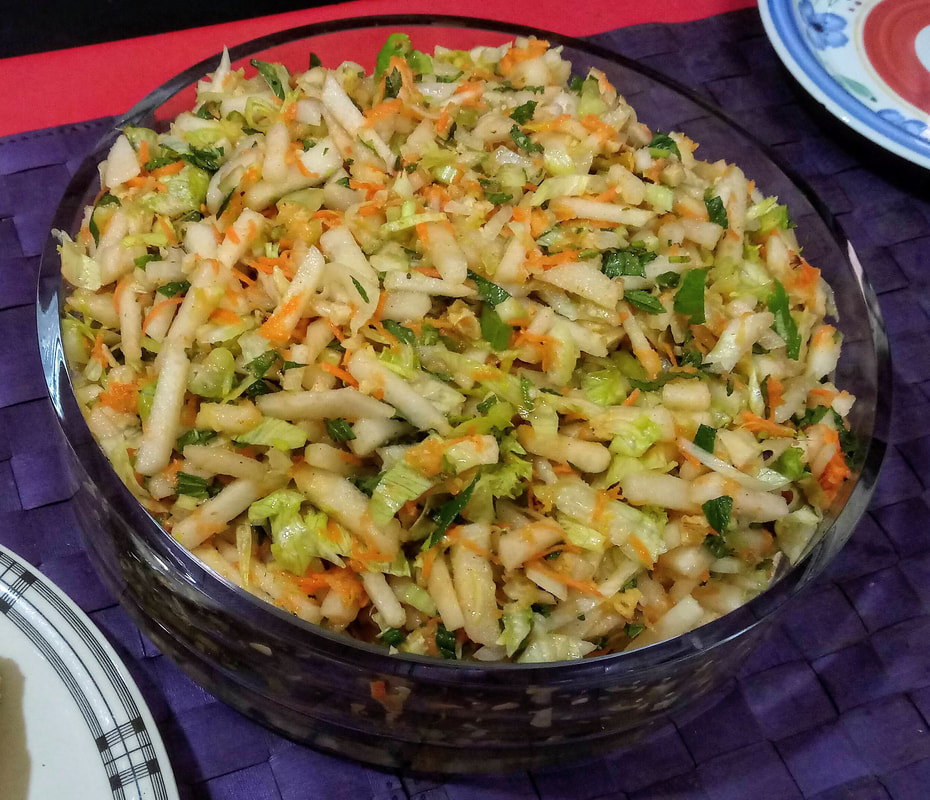 This salad can be made more savory by adding boiled (and chilled) shrimps, or tofu cubes, or pan fried to crispy (and chilled) pieces of chicken breast meat.
It’s truly delicious and very refreshing, perfect salad for hot summer days. You must try it at home! It's an original recipe invented by Yanka, and why did she invent it? Well, surely because she LOVES cooking, and also because we suddenly found ourselves with quite a lot of turkey meat on our hands. Now, I don't just say Yanka's a genius, she really is, and there's nothing that can stop her from creating awesome things. So, here is her recipe. Just one more thing - I can't give you exact quantities of this or that as they professional food bloggers usually do. Yanka is'n even a professional cook - she is amazing and most professional crafter (you must visit our shop!), but cooking is her hobby and when she invents a new dish she freely improvises. Thus, let's call it an 'advanced' recipe, would ya? Here we go: For the marinade Turkey meat - cut into bite size chunks Greek yogurt - enough to fully cover the meat Fresh cilantro - coarsely chopped Put turkey meat in a bowl, pour Greek yogurt on it, add chopped cilantro, mix well, cover and leave overnight in a fridge to marinate For the dish itself Garlic - at least 7-8 cloves or more, depending on how much meat you have Walnuts - chopped, 1/2 cup or more (see above) Oil for frying Smoked cheese - grated, enough to generously cover your meat Heat oil in your frying pan, squeeze all your garlic to it, stir fry for 1-2 minutes, then add chopped walnuts and stir fry for 2-3 minutes more until garlic becomes golden and little crispy. 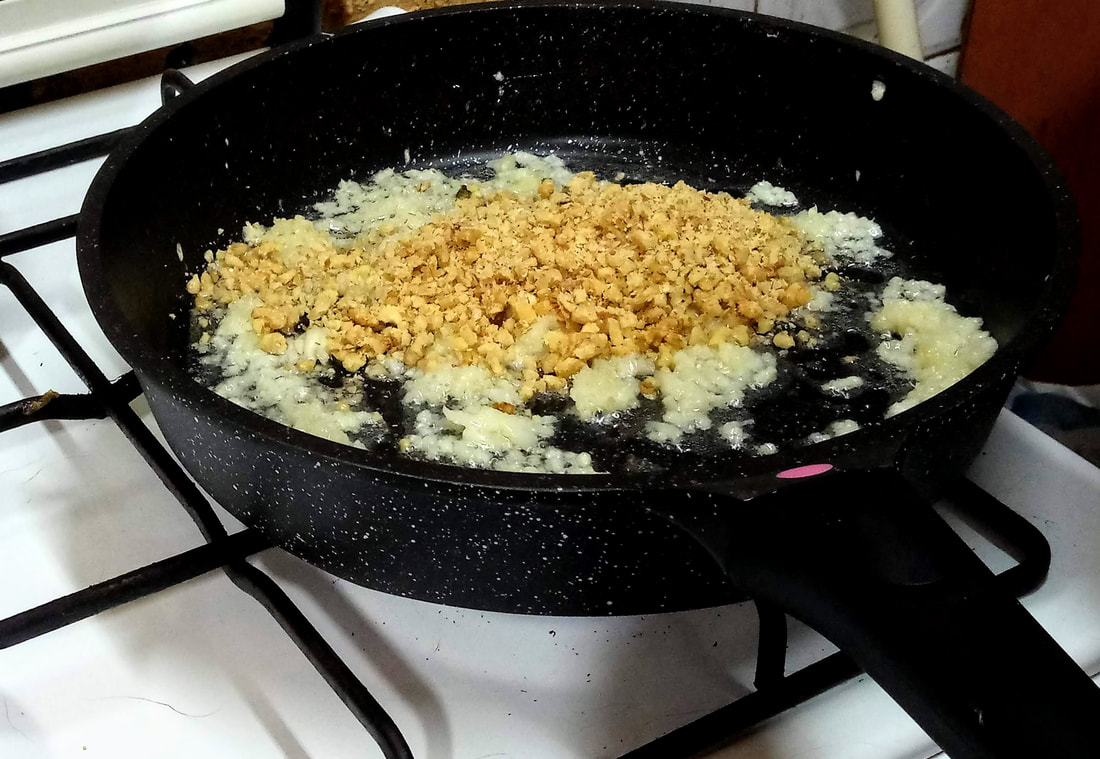 Add all your meat to the pan together with the yogurt marinade... 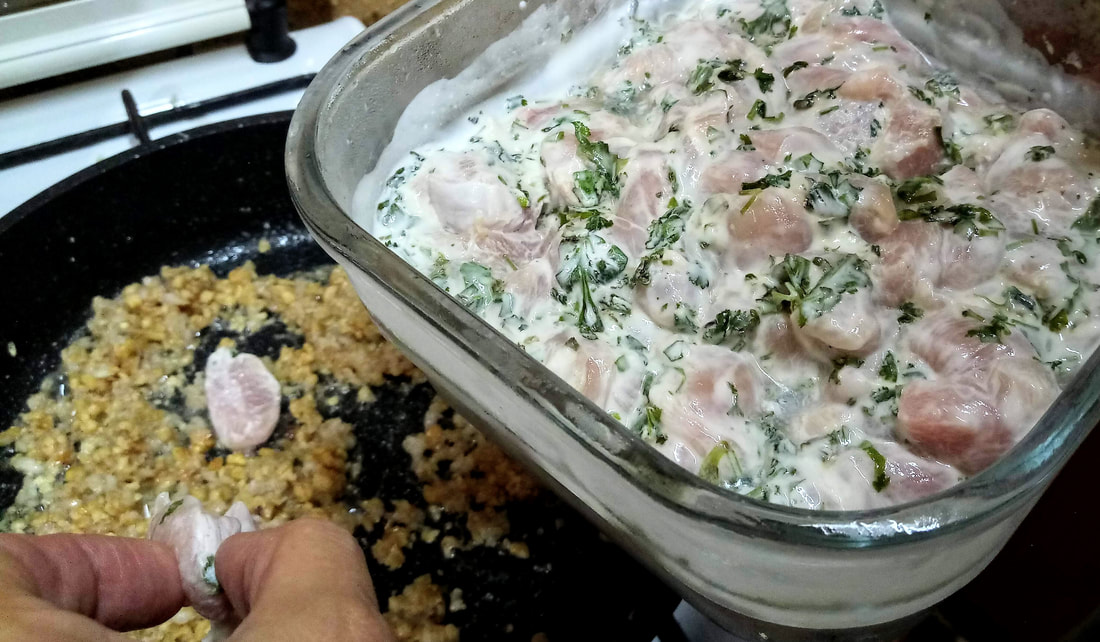 ... and cook on medium heat....  ... stirring occasionally... 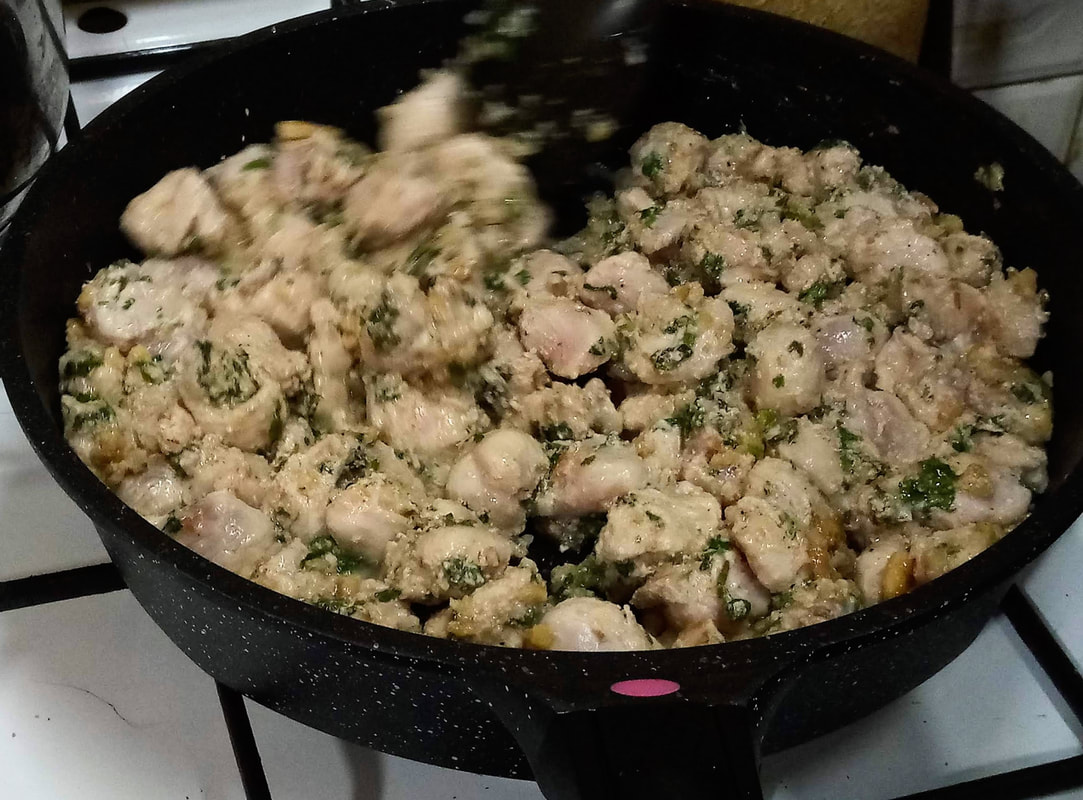 ... until almost done. Generously cover with grated smoked cheese and put into a pre-heated stove for 5-10 minutes or until the cheese melts and forms delicious crust. 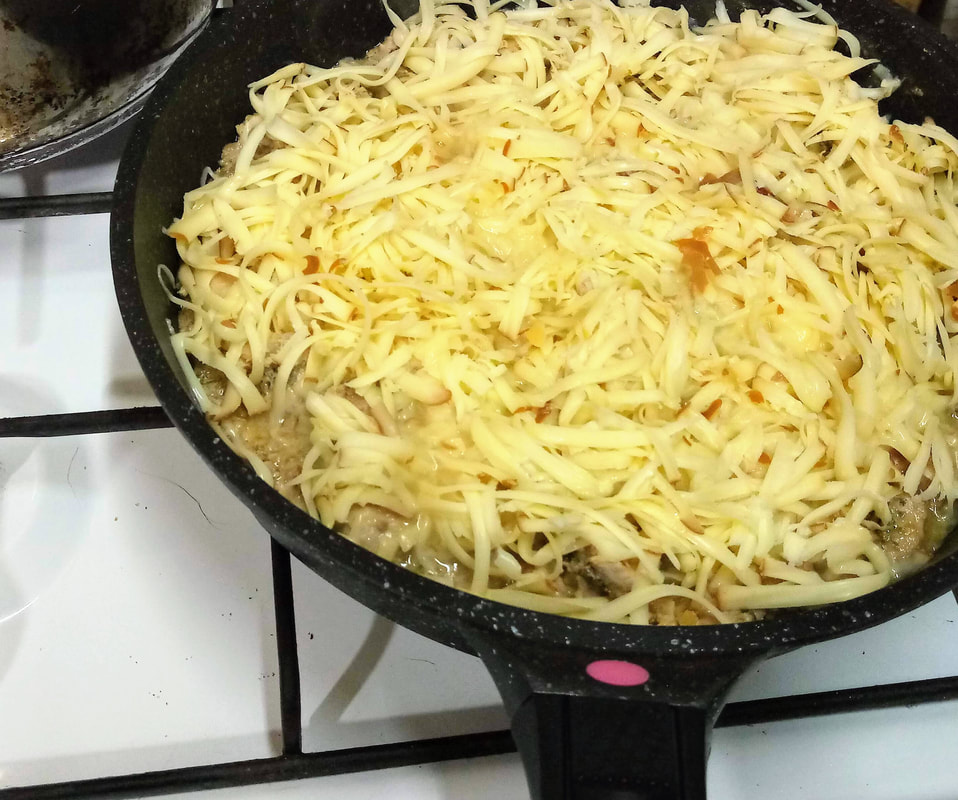 Serve immediately and ENJOY! It goes great with mashed potato, simple tomato and purple onion salad and chili peppers. Bon appetit! 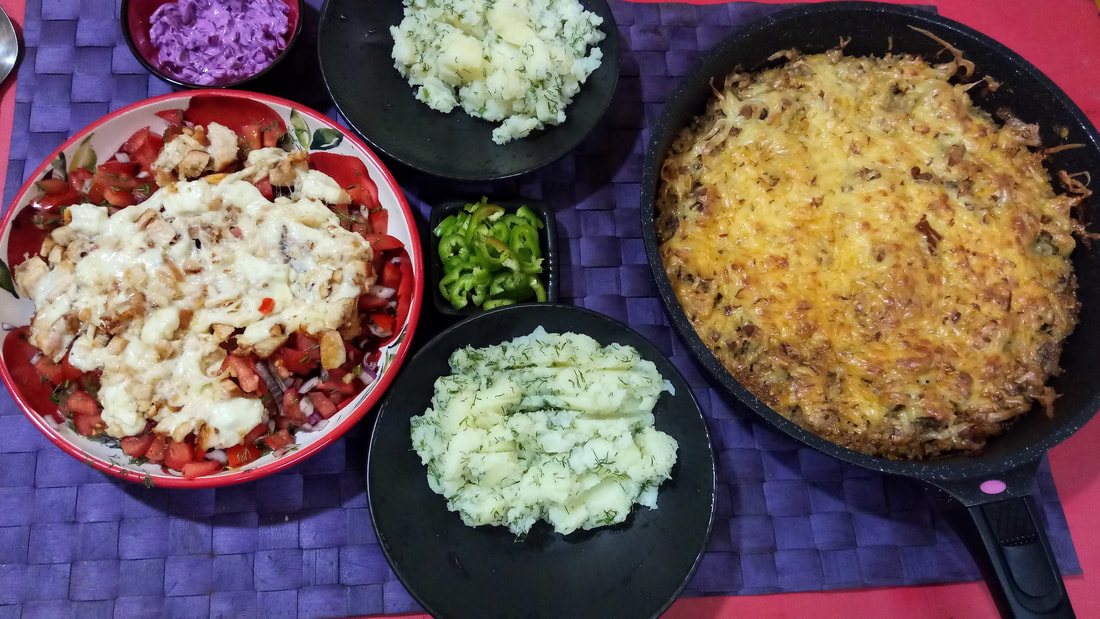 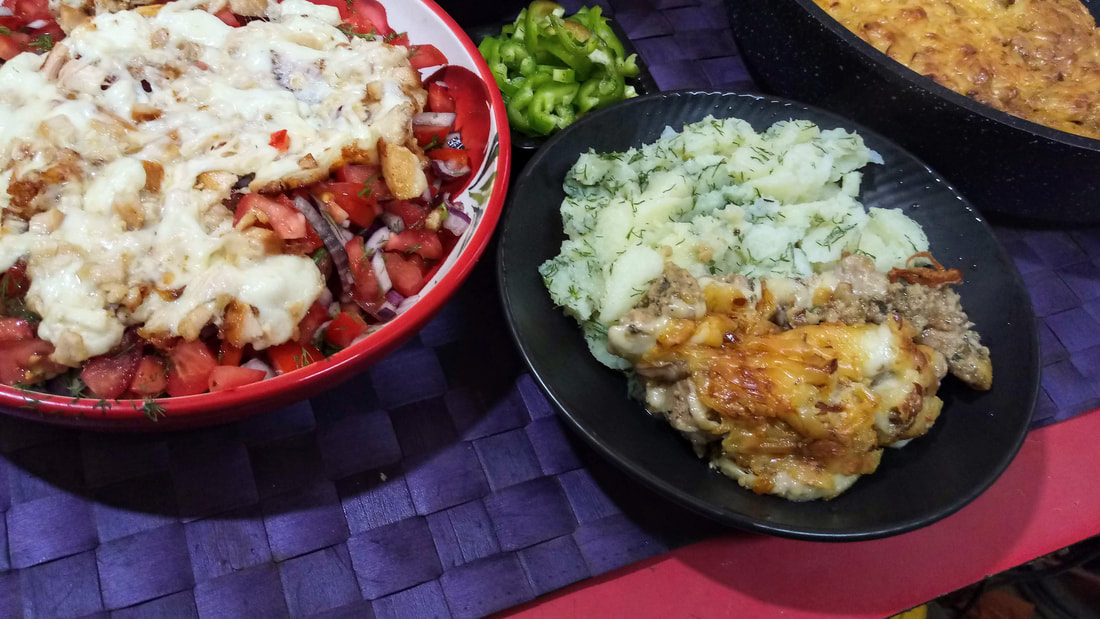
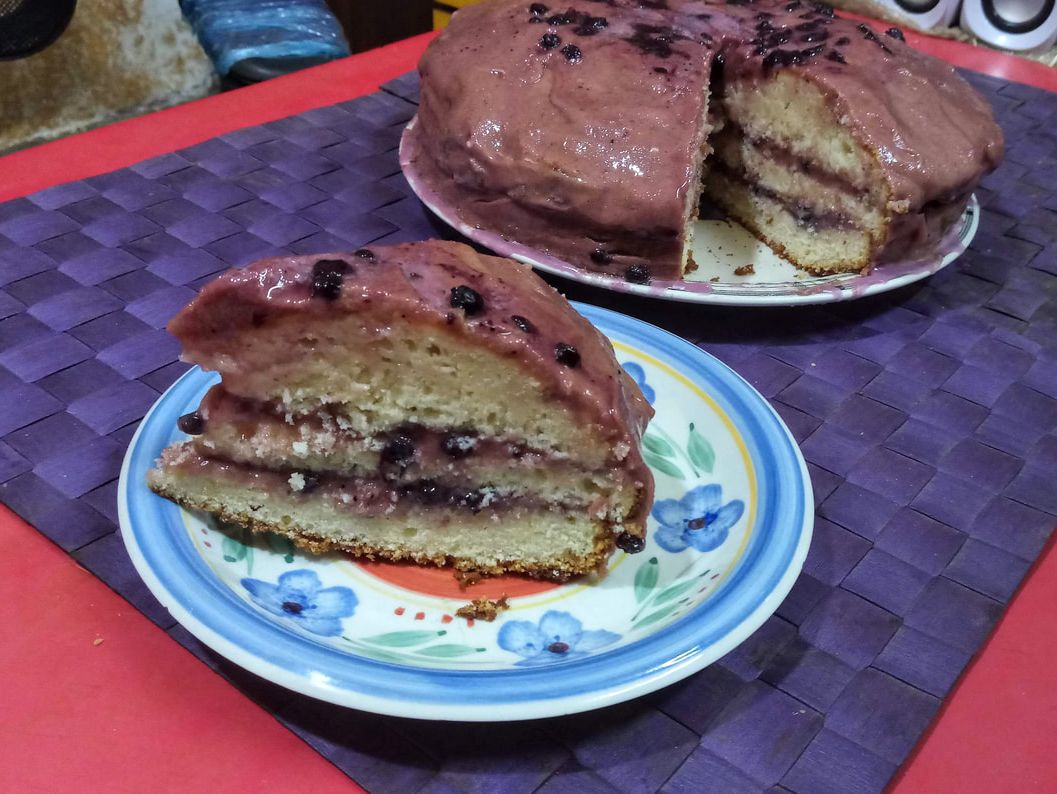
For the cake:
round baking form 26-30 cm in diameter butter 200 g sugar 1.5 cup eggs 3 (separated to yolks and whites) flour 3 cups sour cream 250 ml vanilla sugar 1 pack baking powder 1.5 pack For the cream: juice 1 liter (I used blueberry juice but you can use whatever you like and make orange, strawberry, cherry, etc. cake instead) semolina 7 tbsp (with heap) sugar 1 cup (or more if you use sour juice) blueberries (or any other berries or fruits depending on your choice of juice) You can use canned berries (fruits), frozen (thawed) or fresh ones too. Preparation: Let's start with the cream. Put 7 tbsp semolina and 1 cup of sugar into a pot, pour the juice over it, mix well. Leave for 10 minutes, then place the pot over medium heat, whisk until the mixture comes to a boil, about 2 minutes. Reduce heat to low and cook, constantly stirring, until the porridge thickens, the thicker the better. Yes, you should get a thick fruity semolina porridge. Remove from the heat and leave to cool. We'll turn it into cream later, and now let's make a dough. Soften the butter, put it into a bowl, add 1 cup of sugar, mix until well combined. Add 3 egg yolks, vanilla sugar, whisk until light and fluffy. Add 3 cups of flour in few steps, mixing well each time, add baking powder and sour cream. Mix until everything is combined. The dough will be very tough, but don't worry, we still have to add the egg whites. Whisk the egg whites with 0.5 cup sugar to stiff peaks and add to the dough spoon by spoon. Then the dough will become soft and creamy. Preheat the oven to 180 degree Celsius (350 F) Press baking paper into your baking form to prevent leaking, pour the dough into the form and bake for 35-40 minutes. Check the cake with a toothpick, if it comes out clean, the cake is ready. Remove the cake from the oven and cool completely. Now let's finish making the cream. You should simply whisk your cooled porridge with electrical mixer until all grains are dissolved and the cream becomes lighter in color, at least 5 minutes. Building the cake: Cut the cake (horizontally) into three layers. Carefully remove two upper layers, spread 1/3 berries or fruit slices on the bottom layer, then spread it with 1/3 of your cream. Transfer second layer upon it, add berries and cream. Cover with the third layer, spread the remaining cream evenly on top and side of your cake and decorate with remaining berries or fruits. Put the cake in the fridge and leave overnight. Enjoy! I love cooking, and I love trying new things, so every time I make something really special I post pictures on my Facebook wall. Quite often my friends ask me for the recipe. I was adding recipes in the comments, but it wasn't really practical, thus I decided to create this section on my website and post here everything I like in most convenient way. So here it is, the Classic Georgian (country) soup Kharcho.
Kharcho soup (according to the recipe found here: https://www.iamcook.ru/showrecipe/10536 The original recipe is in Russian but it’s worth to visit for step-by-step pictures and cooking video!)
Beef - 500 g Rice - 100 g Walnuts - 100 g Tkemali sauce - 3 tablespoons White onion (large) - 1 pc. Bell pepper - 1 pc. Red ground pepper - 1/2 tsp Khmeli Suneli spice mix - 1 tbsp. Garlic - 4 cloves Salt to taste Tomato paste - 60 g Cilantro - 3-5 sprigs Bay leaf - 2-3 pcs. When making classic Kharcho beef soup with rice, it is better to use beef on the bone. The broth will be more intense and delicious. Put washed beef in a pot and fill the pot with water. Bring to boil.. When water is boiling, reduce heat to a minimum, remove the foam and continue to boil for 1-2 hours on a low heat (or until the meat is ready and tender). In the meantime, prepare the vegetables. Peel and finely chop the onion, then fry it in a pan until golden brown. Add the tomato paste and mix well. Grind the peeled walnuts in a coffee grinder and combine with crushed garlic, add the nut-garlic mixture to the pan, stir and remove from heat. Remove the cooked meat from the pot and set aside to cool. Strain the broth through a sieve. Cut the meat into small portions and return to the broth. Bring to boil on a medium heat and add rice. Wash the bell pepper, remove stalk and seeds. Cut into small cubes and add to the pot. After 10 minutes, add tkemali sauce, onion-walnut mixture, ground red pepper, khmeli suneli spice mix, salt and finely chopped cilantro. Boil for another 5 minutes and remove from heat. Let the soup stay at least 10 minutes before serving. Better still make it a day before. This is the original recipe as it was posted on iamcook.ru website. I’ve made a full pot of soup for our small family of two, meaning that we’d eat it for 3-4 days, so I didn’t add rice to the soup, but cooked it separately (0.5 kg approx.) and added it every day when reheating the soup portion by portion, ‘cause we both hate over-cooked rice. If you love cilantro, you can certainly add more than stated above and also garnish the soup with fresh cilantro when serving. If the soup tastes too sour (because of tkemali sauce that IS sour) you can add sugar to it little by little. Also, we both love hot and spicy food, so I added green chili peppers to onion while frying it and served the soup with fresh green chilies as garnish. They fit in just perfectly to our taste. I used red tkemali sauce, but there are also green and yellow varieties depending on plum color. Frankly, I don’t know if they taste different. |
AuthorMostly Yanka, but sometimes her husband can't contain his awe :-) Archives
September 2020
Categories |


 RSS Feed